Guide:Ren'Py visual novels on Steam/Store page
|
|
This page is community guidance. It was created primarily by Bob Conway. Like all guides, this page may contain advice that is not valid, safe, or suitable for your particular situation. Please exercise caution. Learn more Community contributions were not requested - please discuss on the talk page before editing this guide. |
Steam offers a helpful checklist, but the process can still be intimidating, as there are a lot of steps and a lot of different graphical resources required.
First, head to your dashboard (https://partner.steamgames.com/dashboard) and click on your game. You’ll see a screen like this:
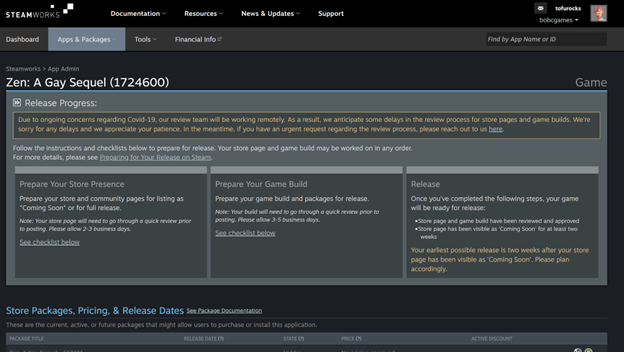
Scroll down to see a helpful checklist of all the steps required to create your store page.
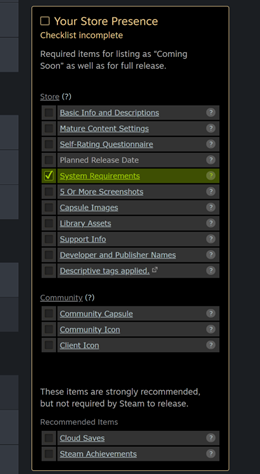
Each step of this checklist is described in further detail below.
Viewing Your Store Page
While you’re working on your store page, you can view any pending changes in the beta mode, via the link in the warning banner.

Or click the "View in Beta mode" link on the main page for your app.

Note that, once your store page is live, after making any other changes, you will have to Publish those changes so they show up in the store. In this manner, you will be able to make changes to a live page without affecting the actual live page until you’re ready. As the text suggests, you’ll use the Publish tab to do this after your game is live.

Configure Basic Info
Either click the "Basic Info and Description" link in the checklist, or navigate to Store Presence > Edit Store Page > Basic Info tab (and then the Description tab).
Most of the fields here are straightforward. However, a few sections require further explanation.
Search Keywords
This should be keywords directly related to your game, such as the game name or portions of the name. Do not include general classification keywords here (such as LGBT, Visual Novel, or Slice-of-Life.... These will be handled later as tags). Here’s the example for YAGS:

Supported Platforms
Ren’Py supports Windows, Mac, and Linux. Here are example minimum system requirements for each Operating System, although you should of course adjust the necessary Disk Space based on your game’s actual build size. (You’ll probably want to use the Steam build for this size. See Making the Steam Build in Ren’Py.)
- Windows
- OS: Windows 7
- Processor: 1 Ghz
- Memory: 512 MB
- Graphics: DirectX or OpenGL compatible card
- No network required
- DirectX Version: N/A
- Disk Space: <Depends on your game build size>
- Mac
- OS: Mac OS X 10.6-10.14
- Processor: 1 Ghz
- Memory: 512 MB
- Graphics: DirectX or OpenGL compatible card
- No network required
- DirectX Version: N/A
- Disk Space: <Depends on your game build size>
- Additional Notes: Game is non-notarized. May not work with 10.15 Catalina
- Linux
- OS: Ubuntu / SteamOS
- Processor: 1 Ghz
- Memory: 512 MB
- Graphics: DirectX or OpenGL compatible card
- No network required
- DirectX Version: N/A
- Disk Space: <Depends on your game build size>
Release Dates
The setting on this page only controls how the release date shows up on your store page. It does not actually set the value. Set this however you want, but I personally prefer to show the "Coming Soon" box, and use only the month and year instead of the full release date.
Adult Content
If your game includes any violence or sexual content (even if it is non-explicit or in passing), you must fill out this survey. Save the rest of your work on this page before completing the survey.
This survey is also accessible via the Mature Content Settings checklist item.
Answer the Yes or No question based on all content in your game, regardless of whether or not it is accessible through gameplay. For example, if there are nude sprite images in your game build that are not normally accessible but are unlocked through a separate patch, you must still answer that your game has adult content. Similarly, if you have explicit sexual text in your game build, you would answer that your game has adult content even if that content must be unlocked via a patch.
If you want to potentially get away with a lower level of mature content on Steam, but still offer such content via a patch, Creating an Externally-Distributed Nudity Patch has some details on ways to accomplish this.
We’ll assume for this document that your game does contain adult content. Select "Yes", which will show additional questions. The questions are mostly straightforward, except for Nudity or Sexual Content (which, when checked, exposes an additional Adult Only Sexual Content checkbox).

Steam considers discussions of specific sexual acts to be Adult Only, even if such discussion does not go into graphic detail or does not feature explicit images (such as CGs or nude sprites). If your game falls into this category, you might as well go all-in and include explicit imagery and detail in your text.
Also note that your Mature Content Survey is published independently of other store page settings (for some reason). Make sure you click "Publish" after saving.

Supported Features
If your game has achievements, select "Steam Achievements" here. (See Adding Achievements.)
Tags
You’ll use a separate tagging tool to select tags. Save the rest of your work on this page before clicking the "Tag my Title" button.
To begin, click the BEGIN button conveniently hidden in the bottom right corner of the page.

The tag tool should be fairly straightforward to use.
Description
After saving all Basic Info, click the "Description" tab. This section should be straightforward, but note that you can include images in your long description by uploading them at the bottom of the page.

After making any changes, remember to Save.
Mature Content Settings
See Adult Content above.
Self-Rating Questionnaire
This page should be fairly straightforward. Other than the Brazilian questionnaire (which you should complete by answering questions), you’ll only add other ratings if you’ve received such ratings from the appropriate review board.
(Note that you’ll likely have received an ESRB rating, as well as other ratings, if you’ve published your game on Google Play. Use those ratings here only if the version of the game is the same as the one published on Google Play.)
Planned Release Date
This is not a link in the checklist, because you set it with the "planned release date" section right above the checklist.

Before setting a date, keep in mind:
After setting a date, you cannot change it without submitting a request to Steam to approve the change, even if your store page is not yet live
You cannot release your game until two weeks after the store page is live… for this reason, I recommend setting your release date as one of the last things before submitting your page for review
You cannot release your game until 30 days after your first purchase of an app credit
Steam will let you set a release date here that is not possible to meet given the above requirements, which you will be unable to change without their approval
The way that the date shows up on the live store page can be customized in Basic Info > Release Dates.
System Requirements
These will have already been completed as part of Basic Info > Supported Platforms.
5 or More Screenshots
Remember that you can capture screenshots while playing a Ren’Py game by hitting the "s" key.
You must have five screenshots to publish your game page. This is handled on the same page as other game assets (such as capsule images), and can also be accessed via Store Presence > Edit Store Page > Graphical Assets tab. You’ll see something like this:

Select your screenshots in Windows Explorer (or equivalent) and drag them to the "Drag images here to upload" section. Ensure that the selection under each one says "Screenshot" and then click "Upload".

After they upload, scroll down to the "Screenshots" section of the page. Here, you can reorder the screenshots and mark them as suitable for all ages. Afterward (even if you make no other changes), you must save the page.

If you want to delete a screenshot, you’ll need to both delete the English version of it (via the "delete" link) and delete the entire screenshot group (which you can do via the "x" that appears when you hover over one of the thumbnails).
Add a Trailer
For some reason, Steam includes this as part of the checklist for the game build instead of for the store page.
Create a game trailer roughly the same aspect ratio as your screenshots, and optionally capture one frame of your trailer as a placeholder image. (I use mp4 and jpg, but other formats may work.)
Either click the "Trailer Uploaded" link in the Your Game Build checklist, or navigate to Edit Store Page > Trailers.
First, create a new trailer, and name it whatever you want.

Drag your movie file from Windows Explorer (or equivalent) into the "Drop movie files here to upload" box.
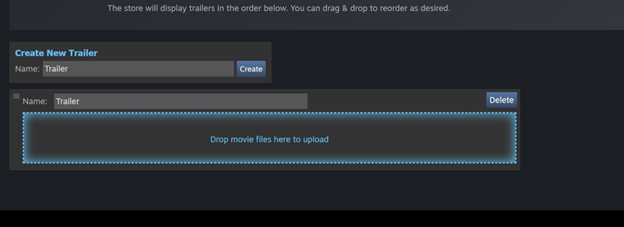
After uploading, the video will convert for a while, and then you’ll have the opportunity to upload a still image as a placeholder image.
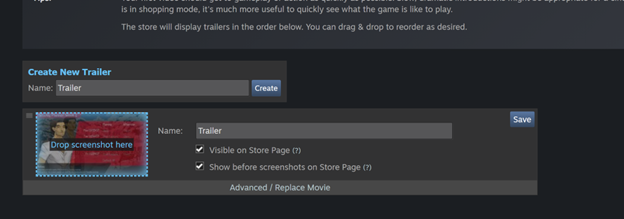
Drag and drop your screenshot and save.
Capsule Images
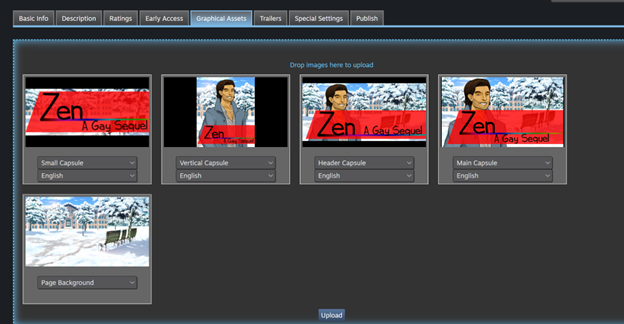
You will need to create four capsule images for your game to represent your game in the store:
- A 460x215px header image, which will appear at the top of your store page and in other store views
- A 231x87px small image, which will appear in search results and recommendations
- A 616x353px main image that appears on the front page (and will probably never get used unless you are popular)
- A 374x448px tall image that will also be used in the store
You’ll need to make sure these images have the logo with the game name clearly legible. You can find templates for the capsule images here.
Additionally you may optionally have:
- A 1438x810px background image that will appear on your game page (overlaid with a blue fadeout tint)
This background image (obviously) does not have to have the game logo.
Once you’ve created these images, click the "Capsule Images" checklist item, or navigate to Store Presence > Edit Store Page > Graphical Assets
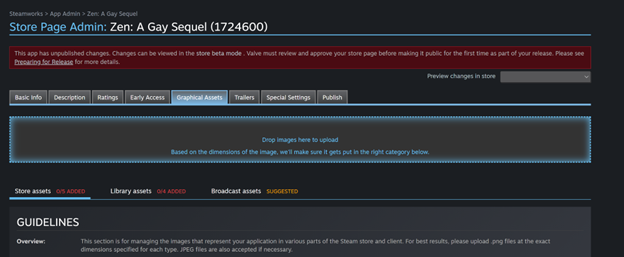
Select your screenshots in Windows Explorer (or equivalent) and drag them to the "Drag images here to upload" section. Ensure that the selection under each image is correct, then click "Upload".
Library Images
You will need to create three library images for your game, to represent your game in players’ game libraries:
- A 600x900px capsule image to represent your game in the large library view
- A 3840x1240px header image to display (and scale) at the top of the game page in the library
- A 1280x720px logo image to overlay on top of the header image above
The capsule image must contain the game logo and the game name in the logo must be legible. The header image should not contain the logo. You can find templates for these images here.
Either click "Library Assets" in the checklist, or navigate to Store Presence > Edit Store Page > Graphical Assets > Library Assets (there’s a small tab under the "Drop images here to upload" area).

As before, drag and drop your images into the "Drop images here to upload" area, and ensure the selection under the image is correct before clicking "Upload". In particular, you’ll probably need to switch the selection for your logo image to "Library Logo" instead of "Screenshot".
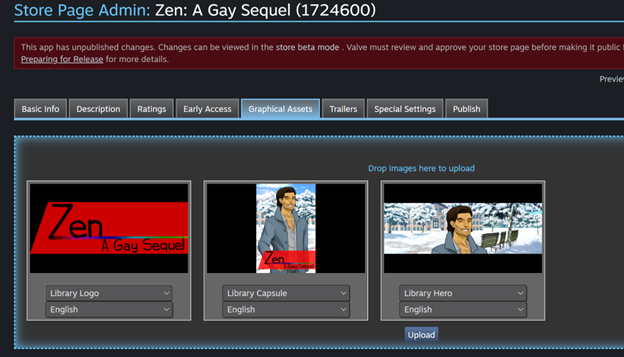
After uploading your images, you’ll have to position your logo on the header background. Click on the "Library assets" tab again and scroll to the bottom, and open the placement tool. As the tool says, you can only pin the logo in one of four places (bottom left, top center, mid center, or bottom center), so make sure your logo is appropriate. (The above ZAGS logo, for example, does not meet this criteria.)

Use the green handles to select between the four positions, and resize as appropriate.

Community Images
You will need to create two community images for your game, for use in its Steam community.
- A 184x69px capsule image for wishlists
- A 32x32px logo image (likely the same as your game’s window_icon or icon.ico)
- This image can be generated via the icon.ico when you upload the Client Icon
Click the "Community Capsule" link in the checklist or navigate to Technical Tools > Edit Steamworks Settings > Community > Assets.
No fancy drag-and-drop uploads here, so just select the appropriate file for each image.
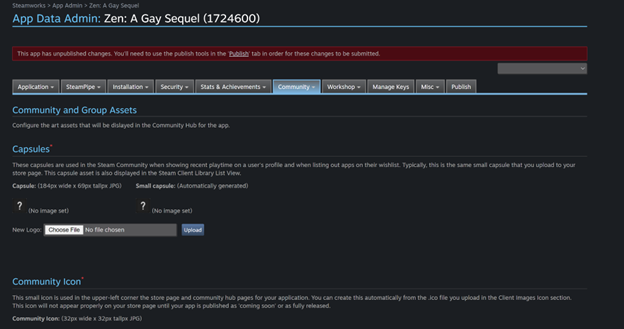
Again, note that the Community Icon can be automatically generated from the Client Icon, if you don’t want to generate it manually.
Client Icon
You can generate the client icons (as well as the Community Icon in the Community Images section) automatically from an ico file. However, note that the ico file you generated for your Ren’Py game will likely not work for this purpose, as it must be an ico file containing a 32x32px image, which is likely smaller than your existing ico file.
I recommend using a website like Online ICO Converter, uploading your gui/window_icon.png file from your game, and specifying the optional "Change size" setting to 32x32.
After you have the ico file (and optionally the icns file from your game build), click the "Client Icon" link in the checklist, or navigate to Technical Tools > Edit Steamworks Settings > Installation > Client Images. You’ll see something like this.

Ignore the "Client Image" section and upload your ico file under "Client Icon", checking the checkbox to automatically convert to TGA and community JPG. (Note that if your upload fails, the error message will appear in red at the top of the page.)
You can also upload your icon.icns file from your game as the Mac icon.
Common Reviewer Complaints
The Steam review process is both thorough and haphazard. These are things you should watch out for that Steam will care about:
- Each of your capsule images (except for the store page background and hero header) must have the game logo unobscured and readable
- For Demos, DLC, and Soundtracks, the banner in the top left must not cover any part of the logo text (even if the text is still readable, and even if that coverage is only a few pixels)... use the templates to ensure you’re good
- The store page itself cannot link to any other storefronts (such as itch.io or Google Play)
- Websites linked from your store page (such as in Basic information) cannot link to any other storefronts (such as itch.io or Google Play)
- Websites linked from the store page that link to websites that link to storefronts seem to be okay… for example, http://zags.bobcgames.com is not acceptable anywhere on the store page since it links to itch.io, but links to http://bobcgames.com (which links to http://zags.bobcgames.com) on the store page are acceptable
- For paid games, ensure that you have a price filled out for each currency. (If your project is an older project, you may be missing currencies that you’ll have to fill in or double-confirm.)
- Your library logo must "float" over the hero header… so any "fixed" elements of the logo should be part of the hero
- For example, the example ZAGS logo above in Library Images required the red logo background to be part of the hero header, with the logo floating over it
- (If you have others that you’ve run into, please let me know)
Submit Your Page For Approval
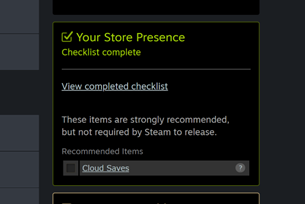
After you’ve completed all required steps in the store page checklist, the section will turn green.
At the top of the dashboard, you will also be able to submit your page for review by Valve by clicking the big blue button.
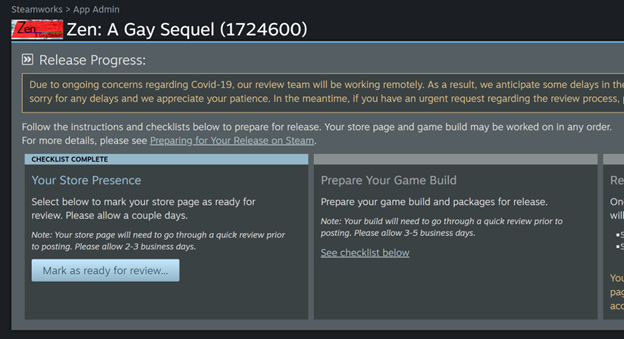
Review, as noted, will take a couple days.
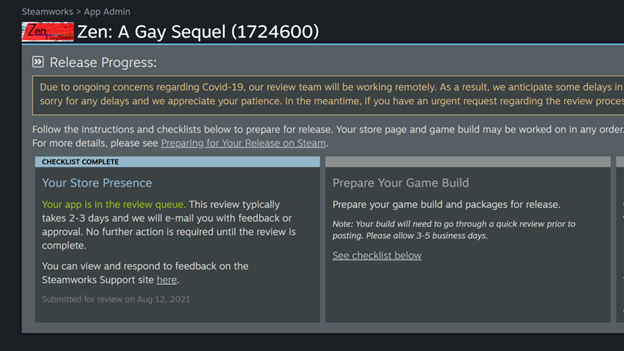
You will receive an email after your page is approved for launch. At that time, the dashboard button will change to a green Launch button.
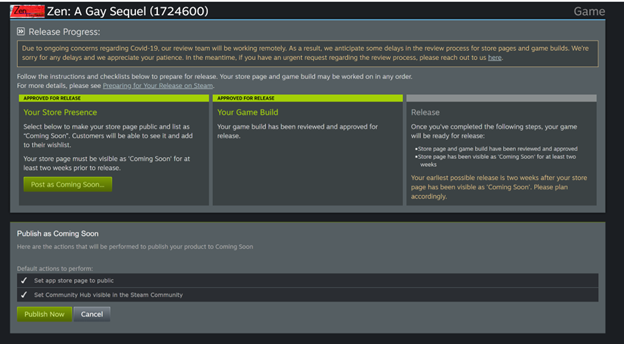
Remember that, after your page is live, you’ll have to Publish any time you make further changes to the store page.
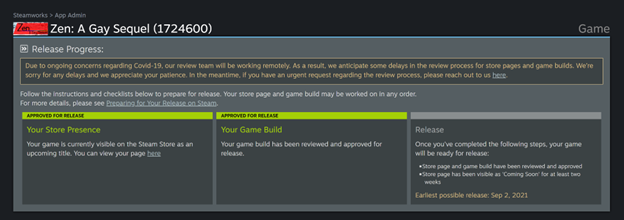
If Valve requires changes to the page or any images, the requested changes will be emailed and will also appear in the "Your Store Presence" checklist and in the "Checklist Complete" section at the top of the dashboard. After making changes, you’ll mark the page as ready for review again until it is ultimately approved.


| |||||


