Guide:Ren'Py visual novels on Steam/Testing
|
|
This page is community guidance. It was created primarily by Bob Conway. Like all guides, this page may contain advice that is not valid, safe, or suitable for your particular situation. Please exercise caution. Learn more Community contributions were not requested - please discuss on the talk page before editing this guide. |
Before Release
Publishing the Build
After making any changes and uploading a new game build, you will need to once again publish the changes (essentially making them "live"). Open the Publish tab, click "Prepare for Publishing" and then "Publish to Steam". It will prompt you for confirmation and some notes for yourself. Fill these in and hit "Really Publish".

For Yourself
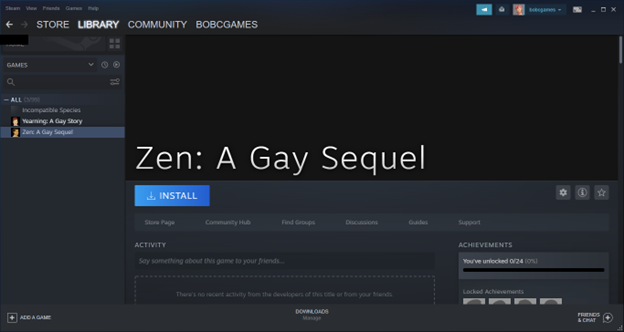
After you have uploaded and published a game build on the default branch, the game should show up in the Library of the Steam account used for the above configurations. You can install the game and run it to test out functionality, including achievements. You can do this even if your store page isn’t yet live. (Remember that you can not test demos this way.)

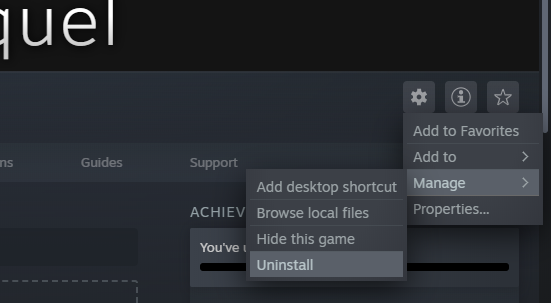
After making changes and publishing a new build, I recommend uninstalling and re-installing the application. This will ensure you have the latest changes without having to wait for Steam to automatically update for you.

With Others
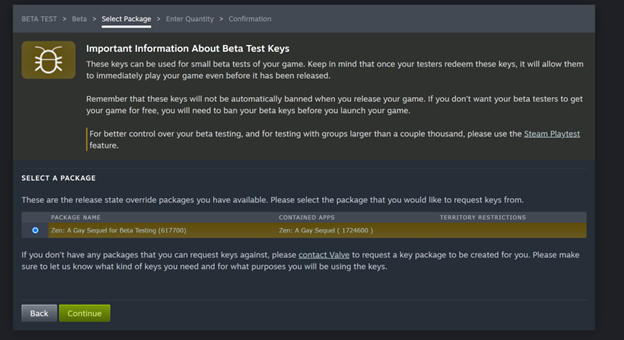
You can generate special beta keys to allow others to help test the game before it is fully released. (This is also the only way to test Demos.) Navigate to Technical Tools > Request Steam Product Keys > Release State Override, and select Beta Test.
Your game should have a beta test package that can be requested.

Steam needs to approve these keys, which will take some time. You’ll receive an email when the keys are generated and approved, and can download them from your dashboard. (Note: You can only download the keys once, so keep the resulting file safe.)

These keys can be redeemed in the usual way, causing the pre-release game to show up in their library. They can then install and play it as normal.
If you’ve already played your game from either the Ren’Py launcher or via a standalone build on the same computer before, when you start up the build from Steam, all existing persistent state and save files will be automatically synced into the Steam version. This is expected. To test a truly new Steam build, you should make sure you delete persistent data for your game from the Ren’Py launcher before installing and running the Steam build. (Of course, also remember that Steam cloud may be syncing save data if you configured it to do so.)
This means that, when starting your game in Steam, you may see all save files and persistent data from that computer. This is expected. It does not mean you accidentally uploaded your save and persistent data into Steam.
If you’re worried, you can confirm you haven’t actually uploaded save data, including persistent data, into Steam, by checking the Depot contents. As long as there is no "saves" directory in the Depot, you are fine.
This behavior is normally useful as it allows players to be able to pick up where they left off from an itch build. If you do NOT want this behavior, change the save directory. In options.rpy, you should see the following line:
define config.save_directory = "SOMETHING-12345678"
Change it to a value that is different from previous values, clear all persistent data from the Ren’Py launcher, rebuild your game, upload the new build, and uninstall and reinstall the game. (Again, note that Steam Cloud may sync save data automatically, defeating much of this.)
After Release
If you need to make changes to your game after its release, but you want to test such changes before making them generally available to players, you should make use of Steam branches.
Click through to Technical Tools > Edit Steamworks Settings > SteamPipe > Builds and create a new app branch. Name it something like "beta", add a description, and add a password (unless you want anyone to be able to grab the beta build).

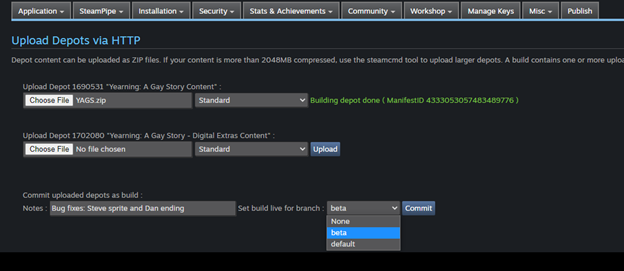
Once the branch is created, you can set different builds live on different branches. The "default" branch is your public release branch, but when you upload a new build (see Upload Your Game to Steam), you can set it live on the beta branch instead of default. You can also manage your builds (and which ones are live) from the same page.

You’ll likely be uploading a new build to the new branch, so you can set it to be live on the beta branch at the time of upload.

Remember that you’ll need to publish for changes to take effect after any upload, even to the beta branch.
After your branch is created, you can select which branch you want to use in your Steam client. A "betas" tab shows up in the Preferences menu. For password-protected branches, type the password to unlock the branch. (It will not show up in the dropdown until you have entered the password.) Opt into the appropriate beta.

After you’ve tested and are happy with the changes, set the new build to be live on the default branch, which will make it available to everyone. Publishing is not required when changing live builds on branches if you’ve already published the build. (You can also disable and then delete the beta branch if you’d like, which will hide the "Betas" section in Preferences in the Steam client.)

Steam will ask you to post a small update when you set the new build live on the default branch for a released game. It’s probably a good idea to add one.
| |||||

